How to Transfer Photos from iPhone to PC Windows 7
Applies to: iPhone X, iPhone 8/8 Plus, iPhone 7/7 Plus or other iPhones running iOS 8 and later
Now on the market, Apple provides various iPhone models with different memory sizes varying from 16 GB to 256 GB for consumers to choose. For those users whose iPhone memory size is less than 64GB, one of the common problems they may encounter is lack of space. However, until now, there is no effective and safe way to expand the storage space of the iPhone. Thus, you are most likely to transfer some of the photos from iPhone to PC Windows 7 for data backup and iPhone space clear.
So the next question is how to export these photos from iPhone to PC Windows 7? Here, in this article, we will show you 2 top free methods to upload photos from iPhone to PC Windows 7 straightforward. Read on to get more details.
Table of contents:
Part 1. How to transfer all the iPhone photos to Windows 7 in 1-click
As the most capable iPhone data manager, EaseUS MobiMover can help you transfer the whole iPhone photos to Windows 7 PC in a single click, including Camera Roll, Photo Library, Photo Stream, and Photo Videos. Besides, unlike the iTunes backup, the exported files of MobiMover is accessible and readable, which means you can view, edit, or delete the images as you like.
- The supported file types you can import with MobiMover:
- Photos: Camera Roll, Photo Library, Photo Stream, Photo VideosVideos: Movies, TV shows, Music VideosAudios: Music, Ringtones, Voice Memos, Audiobooks, PlaylistsOthers: Contacts, Notes, Messages, Voice Mails, Books, and Safari Bookmarks
Now, click the button below (Free Download for PC) to safely install EaseUS MobiMover on your PC running Windows 7 (or later), then follow the steps to import your iPhone photos to the computer.
Step 1: Connect your iPhone to PC running Windows 7 or later, run EaseUS MobiMover Free, then choose iDevice to PC.

Step 2: MobiMover will automatically select all the supported files from your iPhone. Uncheck the category/categories you don’t want to copy to PC according to your need.
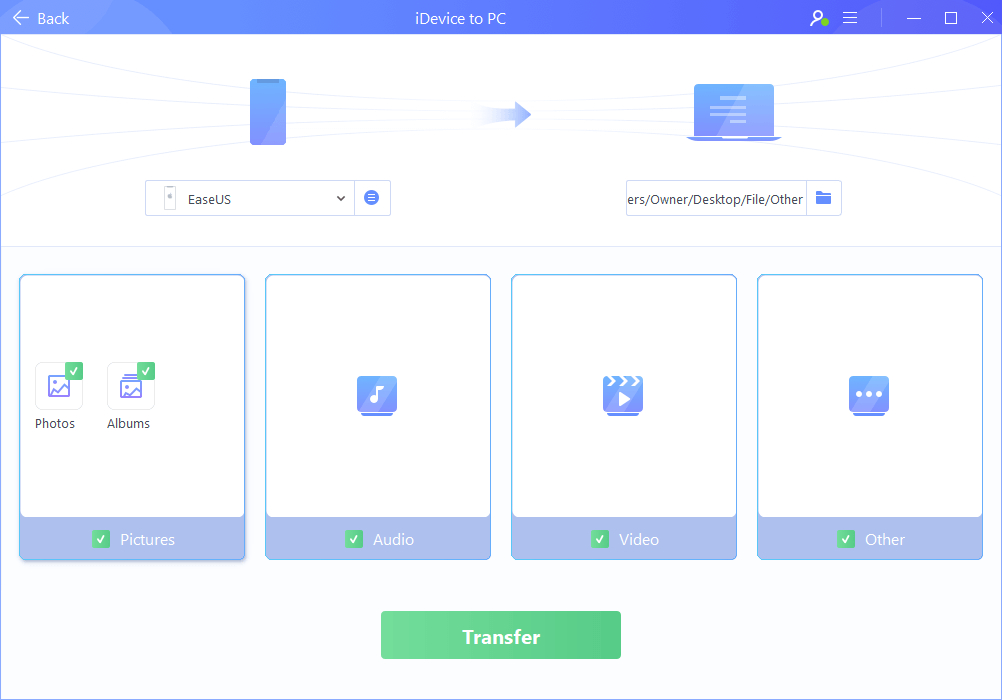
Step 3: Click the folder icon to choose a folder to save the photos. After that, click Transfer to start transferring photos from your iPhone to PC.
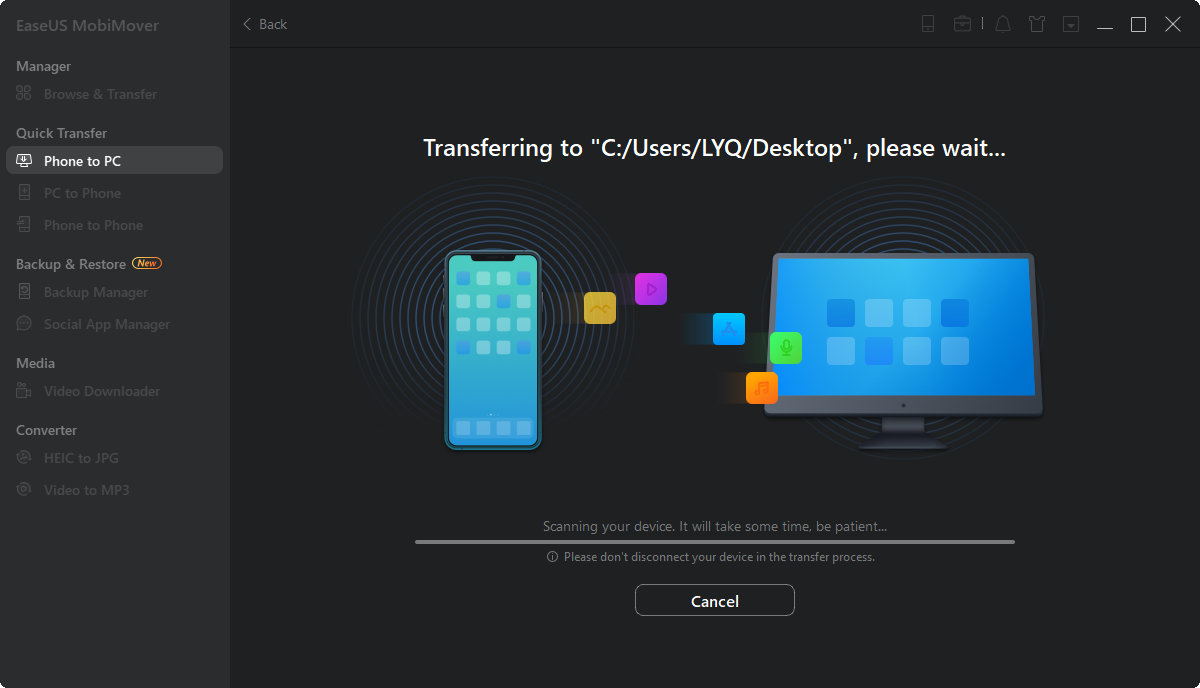
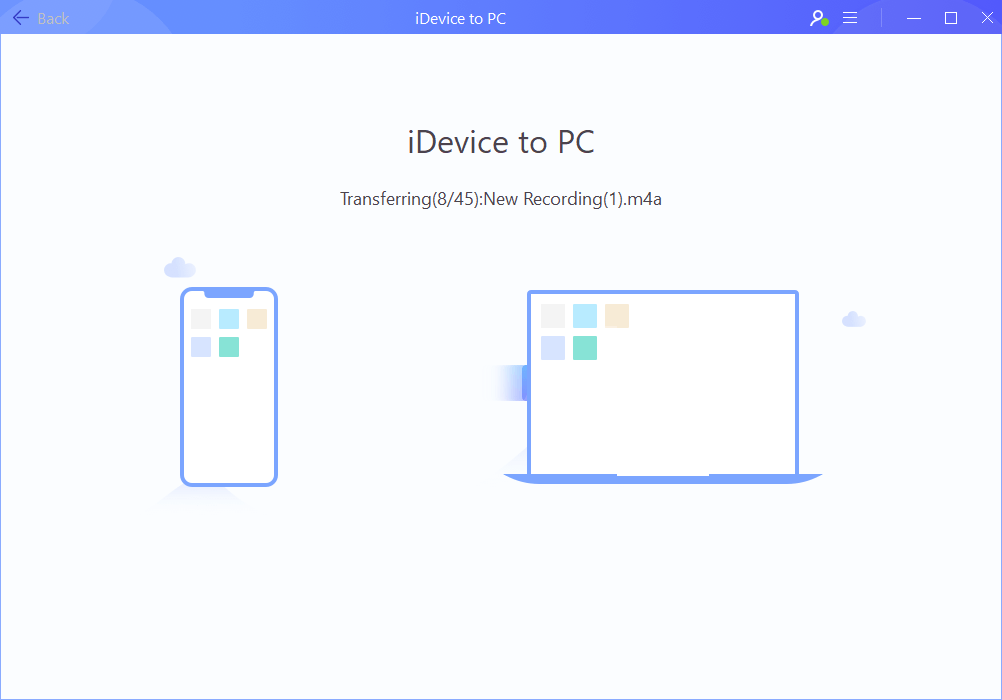
Step 4: The time it takes to copy photos from iPhone to PC depends on the size of the files. Wait patiently for the process to finish and then check the newly imported photos in the selected folder.
Except for move iPhone files to the computer, you can also use MobiMover to transfer content from PC/Mac to iPhone, sync data between two iOS devices (eg. transfer photos from iPhone to iPhone without iCloud), manage iOS data by adding/editing/deleting, and download online videos using URL.
Part 2. How to use AutoPlay to import iPhone Camera Roll photos
- Notice
- When you use AutoPlay to transfer iPhone photos, you can only upload the images in Camera Roll. And the images exported will be organized disorderly. Besides, most of the time, when you plug in iPhone to the computer, the AutoPlay dialog won't show. So if you want to avoid these inconveniences, go back to Part 1 and use MobiMover to help you easily.
Step 1: Enable AutoPlay on your PC Windows 7: Click the Start Menu > Control Panel > Search for AutoPlay > AutoPlay > Turn on Use AutoPlay for all media and devices.
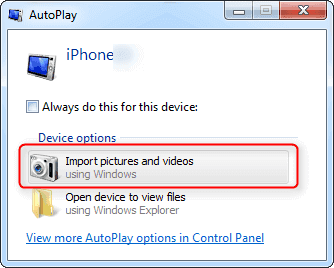
Step 2: Connect your iPhone to PC Windows 7 using the standard USB cable, at the bottom of the new pop-up window, you'll see that your iPhone is plugged in.
Step 3: When the AutoPlay window pops out, choose Import pictures and videos.
Step 4: In Import Settings, choose or create a folder to store the photos from your iPhone.
Step 5: Confirm your setup and click Import to transfer photos from iPhone to PC Windows 7.
Part 3. How to use Windows Explorer to copy iPhone Camera Roll photos
Windows will recognize your iPhone as a portable device, so you can import photos from iPhone to PC Windows 7 with Windows Explorer. Also, it only supports moving iPhone Camera Roll photos.
To use Windows Explorer to import iPhone photos, you have to install iTunes first and choose Trust This Computer on your iPhone when connecting to the computer. Otherwise, your iPhone won't be recognized by your computer. So if you don't want to use iTunes, MobiMover in Part 1 can provide you an iTunes-free method.
Step 1: Connect your iPhone to PC. Open My Computer, and find your iPhone.
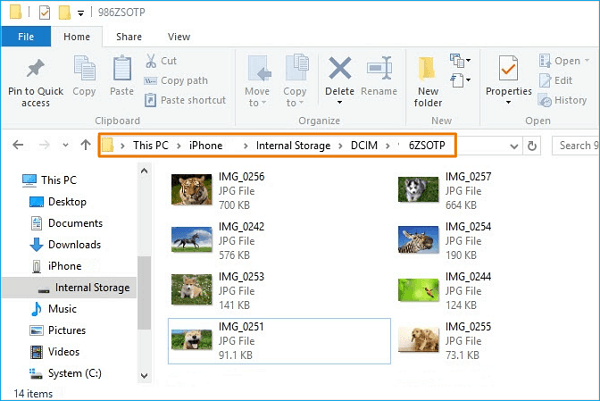
Step 2: Double-click it and you'll see the Internal Storage icon.
Step 3: Double-click it to open it and you'll see the DCIM(Camera Roll) folder.
Step 4: Open the folder and select the photos you'd like to transfer. Drag and drop/copy and paste them to your computer.


Comments
Post a Comment